

Wanted to take a minute to answer some questions and provide some guidance for converting your 06 up Dyna model to 13 spoke mag wheels. We offer 3 different kits because there are different types of mag wheels.
Step 1(before your order my kit)
Identify the type of wheel. There are a few types, let me list them for you.
00-03 Sealed. These come stock with 3/4 bearings and bore holes.
04-05 Sealed. These come stock with 3/4 rear and 1 inch front, some 04 models have 3/4 fronts but front mag bored for 1 inch.
08-Up Sealed. These are normally off sportster models and are preset with 25mm bearings and bored to accept the 25mm center sleeve.
Step 2
Identify which kit is needed. This is best done by removing the old bearings. If you have 3/4 bearings you will need to bore the wheel. If you have 3/4 rear and 1 inch front you will need to bore the rear. If you have 25mm wheels you do not need to bore. Based on this info the next piece is year, either you have a 06/07 dyna or you have a 2008 and up Dyna. Purchase the required kit. Sportster 25mm wheels will not work on the 06/07 Dyna using my kit with out connverting to 25mm axles.


Step 3
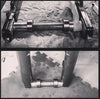
If you have identified your wheels as a bore needed wheel, you can either have it machined or used a stepped drill bit at home with cutting oil. If you decide to go with the stepped bit grab some sand paper to smooth and debur. The bit can cut quick so make sure you pay attention. We usually size the hole to just over 1 1/4 - 1 3/8 (can need more depends on wheel). The sleeve should move more than freely, if the sleeve hole is not cut big enough your wheel may not spin when torqued.

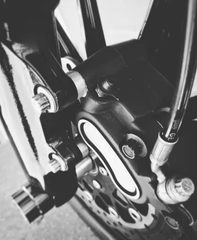
During
After
(You are drilling here the center sleeve goes into the hub)
Step 4
Install the wheel bearings.
On the rear wheel install the rotor side first, be sure to put a generous amount of anti seize on the OD (outer diameter of the bearing) or in inside of the hub. Once seated install center sleeve and install opposite side bearing. If you have a 06/07 Dyna you need to use your stock rear center sleeve. Once complete you should have no movement of the center sleeve in your wheel. (Bearings on rear should be evenly recessed in the hub once seated.
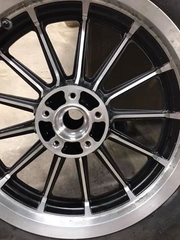
On the front wheel install on bearing so it is sitting flush with the lip of the hub (again use anti seize generously) Once that one is in put the center sleeve in the hub. Continue to the other side and install the second bearing (more anti sieze) Install till flush with the hub lip. When you reach this point the bearing should be flush on both side or slightly recessed (evenly) in the hub. As with the rear, ensure you center sleeve has not play.
This is how both sides should look on your front wheel.
Step 5
Prep your bike.
Remove your stock wheels if you haven't already. Open your master cylinder for your brakes, be careful! It will ruin paint if not careful. Return your pistons to seated position in both your front and rear this will allow the pads to reset to the new wheel. C Clamps are a awesome tool for this if you do not have a caliper tool.
Step 6
The Install
Once you have your rotors, tires and pulley/sprocket installed, its time to install. Start with the back wheel and use the included spacers. If you have a 06/07 your stock spacers will be used on the rear. Tighten the axle to spec (I usually go for 50-60ft on the rear (not in between those two, torque specs are read first 50 then 60ftlbs) spin the wheel and pump the brakes till the caliper sets. Next up is the front, install the wheel and provide spacers, install axle and tighten to 50-55ftlbs (with pinch bolts loose!) tighten up the pinch bolts to 80-120inlbs. It is to be used like a clamp, referred to the manual to ensure you install the clamp correct orientation and spec. Install the caliper with the provided caliper spacers , tighten them up. If you have duals install the other side, all kits come with spacers for duals in case you upgrade in the future. Spin the wheel pump the brakes and set the caliper.
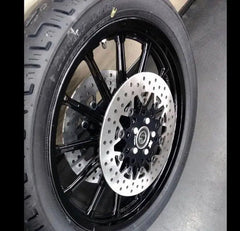
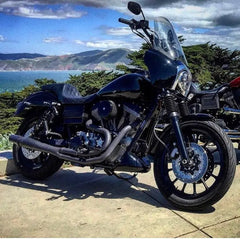
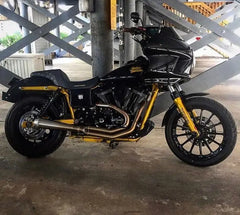
Step 7
Step back and enjoy the slick new look.
If you have any questions please feel free to comment or email me!
thanks for reading!