

TTS for Dummies
An easy review of how to set up and complete a Stock tune.
Preface:
Harleys are hot, well, it’s a Harley get over it. Loud isn’t fast it’s just loud. Adding fuel just sucks gas. Adding fuel may not be necessary. Masking the ECM/ECU with a plug-n-play device is like taking a shower while wearing a raincoat. If you want it done right, do it yourself.
Yes, you have heard these over and over. You have listened to all the ways to make your Harley run better but nothing on the market is better than letting the smartest device on your beloved Harley do its job. That would be the Harley computing device, the ECM or ECU as some call it. If you haven’t heard this before then this is your first Harley experience so congratulations and welcome to the Harley world.
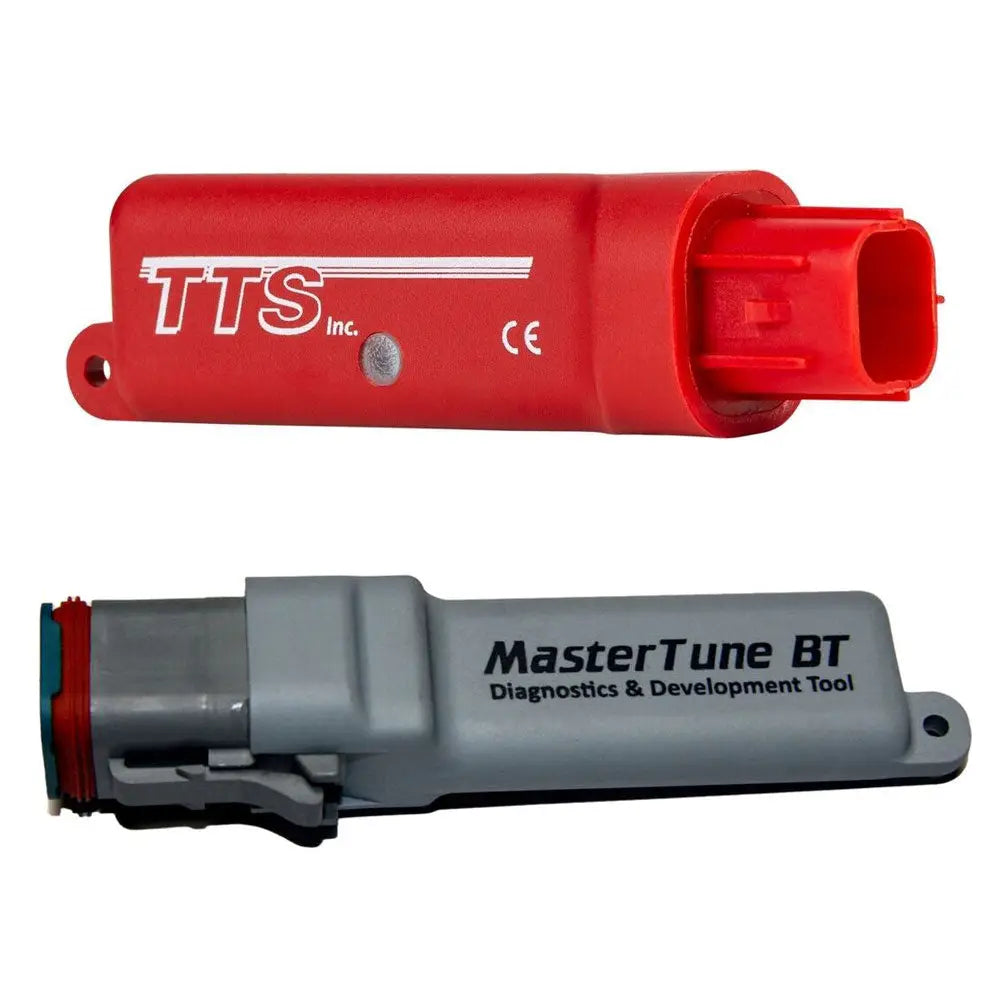
This piece is about working with the TTS MasterTune Flash Tuning Device. There are other brands out there. This is not about them. The original SERT was made by The Turbo Shop (TTS) so why stray away from what is considered the best? You chose your brand, I did.
Whether it is Do-it-Yourself/Closed Course or Dyno there is a proper way to set up and use the TTS Blue Interface. Each person has their own avenue to their end result. Here are some of my thoughts and practices.
- The first rule of tuning is to know a little something about tuning.
- No need to be an expert but it would help to read the TTS manual and help files first.
- Most phone calls to TTS are from people who don’t/won’t read first, do second.
- Don’t be a do first, read second tuner.
DIY/Closed Course hints for the TTS Blue Interface.
Remember, this is based on common questions people have everyday about the TTS as per web interviews and social sites as well as interviews with TTS tech staff. This is not a comprehensive “How to” manual. I will not go into a lot of detail. If you want to know why or how something works then please read the manual. If you see something written in BOLD then pay extra attention. I hope you enjoy this read if you do, please consider clicking on this website and donate to Tunnel to Towers Foundation https://t2t.org/
Beginning phase:
Purchase the TTS Blue Interface from your favorite vendor.
Purchase the correct cable kit. J1850 is the 4 pin connector; CAN BUS and later is the 6 pin connector. If you don’t know which you have then click here. http://www.mastertune.net/products_mastertune.html Then read all of this before you touch the TTS interface.
Set up:
Install the TTS software on your computer. It can be a desktop or laptop or tablet as long as it is Windows OS that is compatible with the TTS software. See the manual for specific operating systems and requirements. The software can be found here. http://mastertune.net/downloads_software_updater.php
Install/Update the TTS software via the Updater program. Consider updating often for newer product functions.
Read the manuals. No need to memorize them but do look them over especially the first parts. The graphs and tables may be confusing to you. Not to worry, forget about them for now. Tuning is a lot easier than you think so don’t get overwhelmed.
Plug the TTS into your computer. Wait until your computer recognizes the TTS Interface. Your computer will set all the drivers automatically. Having an internet connection at this time may be critical for installing the drivers.
Plug the Interface cable into your bike.
Connect the Interface cable to the TTS while it is plugged up to your computer.
Turn your bike on (key on) with the Run Switch on. DO NOT start the bike.
Open the HD06 software program and update the TTS Interface firmware. If the firmware doesn’t match the TTS software, you will have issues tuning. Update the firmware each time you update the software.
When the firmware update is finished, turn off the bike.
Select your starting library calibration:
This your first calibration or starting calibration to tune your bike. It is a starting place; it is not the final tune. Vtuning will get your starting calibration to match your bike. So, if you crank it up and ride don’t be surprised if you see no improvement or get that Harley sound. You’ve got some work to do so let’s get at it.
Open the MasterTune Program.
Choose your bike and model year in the menu.
Choose the calibration closest to your motor modifications. If there is more than one, read carefully then choose one.
If there is NOT a perfect match, then choose the calibration that has fewer modifications. Again, tuning the bike will make this calibration match your bike.
DO NOT select a larger calibration than the motor modifications you have. If you have a stock bike don’t use a Stage 4 calibration. If you chose a calibration that is too big for your bike then you must ask yourself why? When you buy a new pair of shoes do you get a pair two sizes larger?
There are about 200 data point/switches inside the TTS software which are turned on by TTS for different calibrations and bikes. There is a reason they do this. The end user has no way to make these internal changes. If you select a calibration too large you may not be able to tune around the software switches. Take that to heart.
→ If you chose a calibration not intended for your model year bike the TTS software will stop you from flashing your ECM due to the built-in software safeguards.
Where to put your files so you can find and work with them easily:
You can use the auto functions built into MasterTune but I prefer to make a new directory on your desktop. Call it something like “My TTS Tune”. I want it in plain sight where I can find it easily.
Open the chosen starting calibration in MasterTune. Save the file in your new desktop folder. You can rename it something like… “My Calibration-001”
Flash the bike:
With your starting calibration open in MasterTune and your TTS plugged into the bike, key on your bike and flip on the Run switch. DO NOT start the bike.
Select Program Functions. It is in the upper left corner in MasterTune. This will open a screen to make sure your Interface is functioning and has recognized the bike.
Select, in the drop-down menu, Get ECM Information. Click on Run Program. This will give you the details of the ECM part numbers and ID along with the VIN# of the bike. If the VIN# (the entire VIN#) isn’t there, STOP, cancel the software and contact TTS for further information.
Moving on… If all of your ECM info is there go back to the drop down menu and select Save ECM Calibration. Hit the Run Command button. A screen will pop up asking where to save it. Save it in your new desktop folder. The name of this file will be your VIN#. Do not change the name, just save it to the desk top folder. It will be a .MTE file. You will not be able to open a .MTE file, this file type is for the factory only to view. This file will also be saved in the TTS Interface memory. Do not skip this step. I believe the software will not allow you to skip this step for all first-time users. If for any reason you want to put the factory calibration back into your bike this is the file you will use.
After saving the Stock calibration go back to the drop-down menu and select Program ECM Calibration then hit Run Command. There will be two pop up screens. One screen will be for making changes to the Auto Compression Release feature and another for the Speedo function changes. If this is your first time flashing a calibration click on NO CHANGES. You may also select the Options button (next to Run Command) and unclick these features so they will not pop up again.
The first flash to your ECM will be the slowest. The TTS software is making room for the new software so be patient. The progress bar will change colors during this time, that’s OK. When the flash is complete there will be a pop-up screen telling you to turn off the bike. Do so now then get out of the Programming software.
You have just flashed a calibration in your bike. Scary wasn’t it? The first time always is but now you know how to do it!
Cam selector:
Regardless of if this is a stock bike or you have aftermarket cams you should run this data recording. DO NOT SKIP THIS STEP.
Make ready the TTS and computer to gather and record data from your bike.
Open DataMaster.
Select File> Data Recording (proper ECM such as J1850 or CAN BUS)> Cam Tune Data
Save the data file in your desktop folder. Call it Cam Tune Data
A new screen will pop up. Look for the Start and Stop button. These will start and stop your data recording. You can use the other features in the pop-up recording screen such as looking for codes, resetting/clearing the ALV’s (Adaptive Learned Values) without flashing your ECM or simply check to see if the software will see your ECM. So, here we go…
Start the bike and let it come to warm idle.
Start the data recording.
Time the data recording to 3 minutes, don’t cheat and do not blip the throttle.
When you time out 3 minutes turn off the data recording first.
Turn off the bike.
Close DataMaster.
Open the data file in your desktop folder. You should be able to double click it and open the program.
Select View> Camshaft Analyzer> Opening
Read the manual how to analyze the graph. I won’t go into detail here as it is covered very well in the manual.
Find your IVO number. It could be the first large upswing or the number just before it. This is to set your injector to valve timing.
Open your Starting Calibration in MasterTune
Open Table Selection> ECM Tuning Constants.
Reset your IVO (Intake Valve Opening) Cam data in the Cam Selector. Leave the IVC alone for now.
Save the file as “My Calibration-001” same as before. Yes, overwrite it.
Flash the new My Calibration-001 file as above in Flash the Bike.
Start the bike to see how it idles. If it is a rough idle go back to your Cam Selector and chose the IVO setting one number lower. Save the file as My Calibration-001 and flash the bike. See how this calibration idles and choose which IVO will idle the best. Change the IVO to the first number if the bike idles badly, save the file again and reflash.
**Hints: Ride the bike around the block using each IVO number if you aren’t sure. See how the throttle responds. If it is sharp and perky in the lower RPM’s then stop and go home. Don’t worry about a gassy smell this will be fixed when tuning the bike. You can revisit the IVO after tuning but if you do then all of your previous VTuning will be wasted as the IVO or IVC changes the VE numbers as well.
Why not work with the IVC? That takes putting your bike on a Dyno machine and running the bike on a constant load at 3500 RPM’s. You can’t do that at home. Luckily there are only three values on the IVC. You can start at 3 and test the bike then move it to 2 and test the bike again. I’ve rarely ever seen the IVC set at 1 and I’ve rarely have had to reset the starting calibration. Most just leave it alone, I do.
Setting up a VTune calibration:
With your chosen starting calibration open in MasterTune you will need to make the necessary changes for VTuning. If you do not know how then you didn’t read the manual. OK, here is a quick way.
- For Lambda calibrations change all cells to .982 except for the higher kPa column as the program will not let you close loop here, leave it alone. (Make sure there is a red marker to the left of the Lambda number or it will not be in closed loop, this is how you tell if the sensor is turned on or not) For AFR calibrations change all cells to 14.6 except for the higher kPa column, the program will not let you close loop here. Why? These numbers say to the software… Flip the switch for reading 02 sensors. This is also called Closed Loop. The VTune program will not work for cells in Open Loop. This is where you will appreciate “Auto-Extend” during the Vtune process as it will extend to the right your learned VE values.
- Change the PE Mode in ECM Constants to a number higher than your redline. Manual says 10,000 RPM.
- DO NOT change the DE or AE tables. Although this used to be the standard practice it isn’t anymore. TTS found that some calibrations/bikes will tune better if the DE and AE are left alone. So, if your buddy says to, don’t.
**Hint: Did you know that you can click on the top left corner of the table X and Y axis to highlight all cells in the table? Try that now. Open the Lambda or AFR table and click on RPM’s. All cells in this table will highlight themselves. This works on all tables and comes in handy from time to time.
Save your newly created calibration to your desktop folder. Save it as VTune-001. If you save it as VTune-001 then you will always know where you are in the tuning process and what file is in the bike without having to use the file date and time. Each concurrent new file will be renamed in numeric order by the TTS software.
Flight Recorder:
Plug the TTS Interface into the computer. No need to have it plugged into the bike at this time.
Open the FR program on your computer.
Choose Standard mode if you are not familiar with the Advanced functions. If this is your first Rodeo…
DO NOT use Advanced Mode. The Advanced Mode has settings to change the time of recording, the RPM start and stop values and the recording frame rate. You do not need to adjust these unless you are using a Dyno and understand what you are doing. That is why it is called “Advanced”.
Select vehicle year. There is a difference in the 2021 and up models.
Choose the correct ECM. J1850 (4 pin) or CAN (6 pin)
Choose what kind of data to record. When VTuning, use the Vtune data box and so on. For those bikes with Traction Control… do this much later in the process. You will see why so don’t skip steps. Keep selecting OK until the FR says it is finished. I use Generic Data only for trouble shooting. This is more advanced so just ignore that selection for now.
Unplug the TTS Interface from the computer cable and plug it in the Interface cable on the bike.
With the FR software set up in your TTS Interface you can record data without a computer. It will record and save many hours of data. If you have the CAN BUS system, there will be more data sent to the Interface so your recording hours will be less. If the Interface fills up with data, it will drop the first data file recording and start a new one. First in, first out. Trust me on this, you will stop recording long before you fill up the Interface.
**Hint. Depending on what ECM you have you will experience different recording rates so let’s talk about this. The J1850 bikes while using the TTS will record at about 5 or 6 bps speed, this is slow. The CAN will record at much higher rates such as 40 bps but the 2021 and up dropped data sampling back to 1.5 bps, TTS has increased this challenge to 10 bps using the software but that is still very slow. So, what does this mean??
The slower the data recording speed from the ECM the more data is lost between point A and point B. Such as, your first data point is recorded at idle, but the next data point may be 1800 RPM’s as you pull away from a stop light. (Yeah, I know it’s weird) You are not recording real time you are recording history so think about this. When using the slower J1850 and the new 2021 and up ECM’s you are at a disadvantage over the CAN system. You must stay in the same throttle and RPM areas of the calibration to get enough data to change the VE’s. So, make slow and deliberate throttle movements to record as much data as possible in that area then move on. You will not tune your bike with one or two FR passes.
It takes time. Whewwwww, that was a mouth full.
A few years back we used a laptop to record data while riding and in doing so we could use a small extended monitor to the left mirror of the bike and see the VE boxes turn color. If you really get into tuning you too may want to do this, however it is not necessary. WARNING: This could be dangerous so take that with a grain of salt and really understand you should just believe in the process and do the work. Stay with it, be a believer. Be safe at all times and keep your eyes on the road.
Reminder: While using the FR you can stop at any time for gas, lunch or just to relax. You can stop for the day or for the week. Each time you start the bike the FR will start a new file and continue recording. Nice huh? There is no hurry.
Get ready to ride and record:
Ride your first VTune recordings on side streets and back roads (closed course). Take it easy and ride normally with slow deliberate throttle movements up and down. Try not to operate the motor higher than 3500 RPM’s or over 50% throttle your first few times out. You want to get the lower areas in the calibration close before taking on higher RPM’s or WOT. You have a long way to go so be patient and do the work.
When you have completed your first trial run(s) remove the TTS Interface from the bike and plug it into your computer.
Data Conversion using VTune:
Open VTune software. You will get the pop-up welcoming screen explaining what and how. You can click the open box at the bottom saying not to show this again.
Click Next.
The program will ask you where your files are and how you want to proceed. I usually select Flight Record data on TTS Interface. The software will look inside the TTS Interface and gather all the files necessary to continue Vtune. Or you can do it the long way as stated in the next paragraph.
(Remember this is the long way and time consuming) Open DataMaster if you chose to do it manually. Open DataMaster and select File then Load Data from Interface. A screen where the data is located will pop-up. Highlight the data log file(s). If there is more than 1 file, left click your mouse and drag from the top down. This will highlight all the files. Select Save. Save the files in your desk top folder by naming them as FR1. This will correspond to “VTune-001”. The second time out you will name the files FR2 to correspond with “VTune-002”. Soon you will see where I’m going with this.
For the top file selection browse to your desktop folder. Select “VTune-001”. This is the calibration that is in your bike.
On the second or more lines browse your desktop folder. Select each newly created FR1 files placing them in the slots one file slot at a time. You can add up to 10 files. Read below as the steps are the same after collecting the data.
Vtune File Data Conversion continued: Best Way
For the easy way to use Vtune, open the Vtune program and let the software locate, load and convert your files for you that are stored inside the TTS interface.
Select standard or advanced. I use advanced here so I can see the changing tables, most of you will do so just out of curiosity. It’s OK to be curious.
You will see your injector graph. Anything under 80% is OK. Over that and you may need to increase your injector size. Wait and see. Usually an injector size change will be necessary due to your motor build. Stock, Stage I or II usually doesn’t require larger injectors.
Turn on Spark Assist by selecting ON
Fuel processing should be Closed-Loop Stock 02.
Select Yes, Auto-Extend.
Wait for the files to be processed.
At first there will be an EGR table that will show you where the adjustments are made however, this will not happen until you get more into VTuning and get several runs under your belt. Don’t be surprised when this table pops up. You will see as the VE’s get closer to what your motor needs that the EGR will start adjusting.
You will now have a new screen to look at. These are your new VE tables for each cylinder. White means no change; yellow surrounding the cells means not enough data, this is normal. Pink or dark red means data changes. The darker the more change in VE%. (See the % scale at the top of the page.
In the drop-down menu click on Spark Advance. You will see any needed changes in the spark table for each cylinder. The software will only pull timing it will not advance timing. Stock M8 motors usually have too much timing in the higher RPM’s and kPa so expect timing adjustments there.
Select Accept and save your file to your tuning folder. The name will be changed via a increased number at the end of the file name. Do not change this. This should be automatic via the TTS software. Why? So you can keep the VTune files straight. 001 for your first run, 002 for your second run and so on. See where I’m going with this?
Ready to FR some more? OK, let’s get to it…
Open “VTune-002” in MasterTune.
Flash the file into your bike as stated above.
Start FR as directed above. Each time you set FR to record again all the old data files in the Interface will be deleted. If you decide to use your computer instead of the Flight Recorder do not worry. The FR will not work and will bypass all the data to your computer by using the Data Master record feature set to Vtune.
Remember, after getting several data runs in, you should try to hit the higher RPM’s and throttle (kPa) cells. Use your gearing and hills as the load. Take a passenger. There is no need to speed. VTuning is not about speed. It is all about filling in the data cells in the VE tables. Practice makes perfect.
If you want to use your computer and watch the Histogram screen with an extended monitor then fine. This will help you fill in the cells. You can actually see where you are at in real time. Caution: Watching a monitor means you are not watching the road. This can be dangerous and I highly do NOT recommend you doing it. No matter if you are a new rider or have been riding 100 years. This is experience talking. Yes, I’ve used an extended monitor and know how freaky dangerous it is.
Or, you can watch the Histogram in DataMaster after the ride to see how and where you ride. It’s interesting to see and can tell you much about where you need to get more data.
From here, see above Vtune File Data Conversion continued: Rinse and repeat. Do this as many times as it takes to fill in and change your VE’s, spark and EGR.
You now have used the FR to make VTune runs and you’ve gotten pretty good at it. The file in your bike is the last one generated in the VTune software. It is called “VTune-00?” or whatever. Did you hit WOT? No?? OK then. Make sure you have the last generated VTune file in your bike. Set up FR/VTune again and head out to a very safe area. Remember, there is no need for high speeds when tuning. Use lower gears and loads. Do several (3 or 4) Wide Open Throttle pulls in the lower gears (try 3rd gear). This will help fill up those missing VE cells. Be safe, all tickets are yours and they aren’t cheap. If you don’t bang on your bike then don’t. WOT cells can be Auto-Extended during the Vtune process. It won’t be perfect but we all understand not everyone wants to use WOT and thump the bike that hard. Remember, speed is not the answer, RPM and load is so use those lower gears.
Traction Control:
This is all new as of the second addition of TTS for Dummies.
Do you have traction control? Do you have a button on the right or left hand controls that says TC? That’s for your traction control, ON or OFF. Newer bikes past 2020 may have TC but no hand control button. Do you have RDRS? Here is a very long explanation of RDRS and how it influences your ride. https://www.youtube.com/watch?v=GbiPayv9inc
TTS uses equations and tables to adjust for TC/RDRS. I want to make this as less complicated as possible so I will not explain. I will simply tell you how to use the TTS software to get the most out of this. “You’re Welcome”.
Open FR as usual but instead of choosing Vtune or General Data choose Traction Control and go ride. You’ve VTuned many times so now go get this done if you have TC. Get as much data as you can I mean really load it up with data and come back to the computer. Open DataMaster and select File then Load Data from Interface. Save the Traction Control data as TCdata-001.
Due to the advanced and constantly changing coding we must use a special website that TTS has made available for us. Here is the link and I will tell you how to use it.
http://www.mastertune.net/VTWEB/
NOPE… this will not Vtune your bike. Let’s work on Torque Control. After you get your TC adjusted then you can go back to Vtune if you want to continue to work on EGR or timing.
Go to the website and click on “I’m not a Robot”. Ignore the next screen. It is just same mubo-jumbo of what I am telling you now.
Add your working “VTune-00?” file. This is the file that is in your bike while you used the Traction Control Flight Recorder. Add all your TCdata files and let it rip. Pay no attention to any pop-ups and save the new file. Flash that file to your bike and reset FR for TCdata. Rinse and repeat just like VTuning. You will soon notice how smoooooth your bike is now. I can ride mine at 1100 RPM’s in 3rd or 4th gear and slow throttle up with no bouncing on the compensator or engine bucking.
WHOA>>> Wait!! Did you get a pop-up that said your bike does NOT support Traction Control? Yes?? Then this Bud is not for you. Only TC bikes possess the proper imbedded code held within the calibration and can use this web based configuration…. Sorry.
Using EGR Tables:
Since the TTS VT3 software does this for you later in the tuning runs I didn’t bother working with this. It’s hard to put this video game into words. Could be a very good reason why you can’t find much about it on discussion forums. No one can describe just how to use it easily. If you want more on this subject read the manual for now.
Using the MasterTune 3D graph:
Use this tool. The graph will allow you to view valleys and peaks in the VE tables. These peaks and valleys can be smoothed out by changing your cubic inches and using your EGR tables. Did you know you can click on the graph with both mouse buttons and spin the graph? Very cool, try it to view the graph in different angles so you can read the scales better. The smoother these graphs the smoother the ECM will calculate and the smoother and more power you will have built within your tune. You can use the 3D graph in about every table within MasterTune.
Using Generic 02 Data:
What is this for? Here is where some tuning knowledge comes in. You need to know what this data means. You recorded it; you look at it but don’t understand it or the DataMaster software.
The DM has been made to be very flexible. Did you read the help files? Did you know you can zoom into the graph? Did you know you can change C* to F* by clicking a button? Did you know you can change the graph menu or make a graph line a different color? No??
OK, here’s what I was talking about. Please read everything you can. TTS makes sure we have actual manuals and help files to understand their product unlike other products that are hazed in mystery and best guess. Yes, sometimes the manual can go outside the norm of understanding. The manual information comes from Steve Cole, owner of TTS. He lives and breathes his product. To do this he must understand every facet and relay this information in a layman term. It’s tough to tone things down while writing this. I can’t imagine having to write the TTS manual.
All the information for each TTS software program has Help files. Open them up, read them, and play with the programs. They won’t break. See what you can do and how you can read the data of exactly what’s happening.
To me, the DM is the most important piece of software to enhance and smooth out your beloved Harley. When you exit the DM program it will ask you if you want to make the changes to be your new default… Watch out! Click Cancel on the pop-up screen to keep the factory defaults.
>>More about the DM software if you want hands on instead of automatic. Want to see where your knock is? What RPM or TPS/kPa was the knock and which cylinder? Easily found after doing a Generic 02 data recording. No need to ride for an extended period of time. 10 minutes of data will tell you tons of info. Grab a WOT gear or two and see how your injectors are performing or see where your 02 sensor readings are, too rich or too lean?
Data history. What does this mean? Let’s take a moment to describe what is happening here. Let’s use knock retard as an example. You did a generic 02 data run. You set up the graph menu to see the knock spikes. To find the TPS/kPa and RPM where the spike is simply placing your mouse over the spike and click. Use your left and right keyboard buttons to move over the spike and look at the data above or to the right.
Because data recording is HISTORY you are looking at the history of what your bike just went through. Before it can be recorded it has to happen first, yes? When you find the exact moment of your knock retard move one or more frames to the left just before the knock… when the knock timing * says 0 that is where your knock happened. Then the data recorded it. It took a frame or two to put it in the data…. History… Now you are way ahead of the game.
Take the first frame before the knock retard and look at the TPS/kPa and RPM. That’s where you want to make your timing change. Knock could also be fuel related. If the knock is in an Open loop area try adding 5% or 10% to that VE cell instead of taking 2* off your timing.
Want to discuss more? OK, here’s a little thing. How well is your stator and regulator working? See the bike voltage at different RPM’s. Is it low or is it just fine? How could you tell?? Look at the data. Want to know what your real idle RPM is or what your engine temp or head temp is? It’s there too.
The DataMaster program tells you what to change in your MasterTune software. Use DM to get the facts, use MT to change your bike with the real facts.
Using Spark Tables:
Spark tables… Ughhh. Why is it so important to change your spark? Answer, you really don’t need to on a stock bike in most cases. There are exceptions such as if you have knock/ping in a certain area you may want to reduce by 2* and go again. Use the 02 data to find this knock and the area it is. We just talked about this in the DM area.
There is really nothing shrouded in mystery like timing tables. Should I increase my timing or decrease it? Where should I add or retard?? Why should I???
Slow your brain down. If your bike is running hot and has a good tune it could be timing. It could be low or it could be too high or it could be just low on oil. Hard to tell without seeing the data or changing your timing. Most people ride in cruise range of 2300 to 2800 RPM’s and 35 to 50 kPa and 5 to 10% TPS. Do a generic 02 data while riding in that area for a while until you feel the bike getting hotter. Select a higher RPM and ride in that area for a while or until you feel the bike getting hotter.
Open the data file in DM. Look for the head and engine temp rise while watching what RPM/TPS/kPa areas. Look at your timing in that area too. Is it lower than the rest of your tables? Do you have knock retard there? No knock retard probably means the timing is too low. Raise the timing 3* and go ride again. Check your data to see if the head/engine is less. Bingo, need to mess with your timing tables. Don’t be scared to raise timing cells in the surrounding areas such as take a row or two in the lower and higher RPM’s. Do the same with the TPS or kPa. Take a block about 4 or 5 cells high and 5 or 7 cells long.
With the new Vtune3 program all this timing is done for you but there are techie guys out there who will want further explanation. Well… you won’t find it here, read the manual!
Making your final calibration:
This is probably the easiest part of the TTS programming. Open your last VTune generated file where you have been working on your EGR and VE’s. Open the Lambda or AFR tables. Highlight all cells and click Set to Original. Do this for any and all tables you manually changed to set up your Vtune calibration. Open the ECM Constants table. Reset your PE mode back to original or 4300 RPM’s. Save your calibration as… drum roll please… “My Final Cal-001”
OK… that’s about it for the TTS for Dummies. Sure, there is a lot more but this will get you started and on your way to understanding the tuning aspect of a Harley. Best of luck to you and safe riding.
Disclaimer:
I do not work for, nor was I paid by anyone to write this. If you read this and apply it to your tune then muck up the bike (or yourself) because you skipped a step or applied it wrong or rode like an idiot and crashed then it is on you and your pocketbook, not mine. When tuning on the road, which everyone knows you will, then safety is always paramount. Tuning isn’t about speed. It’s about working the throttle and RPM’s with gearing and loads. Be Patient and above all else, be safe.
Affiliations:
I have no affiliations, other than being on friendly terms, with any manufacturer or Dealer. Harley is a trademark of Harley-Davidson. The name and the company belong to them but it’s impossible to have a conversation without saying the word Harley… so, sue me. Isn’t it stupid to be made to write that??
The terms I use here can be found in the TTS Manual. If you don’t understand the terms I highly suggest that you please read the manual, it won’t bite you. All software for the TTS is free and can be found at this web address. http://www.mastertune.net
Thanks and appreciation:
Steve Cole, owner of The Turbo Shop (TTS), has taken many hours of his valuable time to educate me on countless things about tuning a bike, the operation of the TTS and how to apply the software. We’ve talked from dinner time to the wee hours in the night just to knock things around. It’s taken years for me to learn this because I’m hard-headed and will therefor remain anonymous. His knowledge of the tuning world and product expertise, his myriad of sleepless nights to give his customers the best is paramount to him whether he will admit it or not. Without his constant push to the dark side this piece couldn’t have been written. Thanks Steve.